Introduction to Installing a Swing Set
Installing a swing set in your backyard can be one of the most rewarding DIY projects for parents and families. A swing set doesn’t just add a source of entertainment—it creates a lasting outdoor space where kids can enjoy hours of safe, imaginative play. When done right, a swing set installation can transform an ordinary backyard into a fun zone that rivals any playground.
But here’s the truth: while many people assume it’s as simple as unpacking the box and tightening a few bolts, the process requires planning, precision, and attention to detail. Swing sets must be sturdy, safe, and properly anchored to withstand both enthusiastic kids and changing weather conditions. A poorly installed swing set can become a safety hazard, which is why following the right steps is crucial.
Before you even pick up a wrench, you’ll need to decide where to install it, what tools are required, and how to prepare the ground. In this step-by-step guide, we’ll walk through every part of the process so you can feel confident about building a swing set that’s not only fun but also safe and long-lasting.
Why a Swing Set is a Great Backyard Addition
Swing sets aren’t just toys—they’re investments in childhood memories. For kids, a swing set offers hours of adventure, from swinging high into the sky to racing down a slide or climbing a rock wall. For parents, it provides peace of mind knowing their children have a safe place to play close to home.
A backyard swing set encourages outdoor play, reducing the reliance on screens and video games. It promotes physical exercise, coordination, and strength building. The simple act of swinging works muscles, improves balance, and even provides sensory benefits for younger children. Plus, it encourages social play when friends or siblings join in.
From a practical perspective, swing sets can also increase the value of your property. Families often look for homes with functional outdoor spaces, and a well-maintained play structure can be an attractive selling point.
Simply put, a swing set is more than just equipment—it’s a lifestyle upgrade.
Things to Know Before Installing a Swing Set
Before rushing into the installation process, there are a few important things to keep in mind. First, consider the size of your swing set compared to the size of your yard. Many people underestimate how much space a swing set requires, not just for the structure itself but also for the “safety zone” around it. You’ll want at least 6–8 feet of clearance on all sides to ensure kids can swing freely without bumping into fences, walls, or other obstacles.
Second, think about the surface material under and around the swing set. Grass may look nice, but it doesn’t provide much cushioning in the event of a fall. Safer options include wood chips, rubber mulch, or play sand, which absorb impact and reduce the risk of injury.
Finally, check if your neighborhood or homeowners’ association has restrictions on play structures. Some communities have rules about the size, location, or type of swing set you can install. Taking these steps beforehand saves you time, money, and frustration later.
Preparing for Swing Set Installation
Preparation is the most crucial stage of swing set installation. Skipping it often leads to mistakes like uneven setups, unstable frames, or unsafe play conditions. Before you even open the instruction manual, make sure you’ve covered the basics: selecting the right location, gathering the correct tools, and ensuring safety protocols are in place.
Choosing the Right Location in Your Backyard
Picking the right spot for your swing set is about more than just convenience. The location you choose directly affects the safety and longevity of your structure. Ideally, the swing set should be placed on level ground, far away from hazards like trees, fences, sheds, or power lines. A flat, open area ensures kids won’t accidentally collide with anything while playing.
Sun exposure is another factor to consider. You don’t want the play area to become unbearably hot in the summer, so look for a spot that gets partial shade. However, avoid placing it directly under large trees where falling branches could pose a danger.
Also, think about visibility. Most parents prefer to install swing sets in areas they can see clearly from the house, particularly from the kitchen or living room windows. This makes supervising kids easier and safer.
Tools and Materials You’ll Need
Having the right tools on hand makes installation smoother and faster. Typical swing set kits include bolts, screws, brackets, and instructions, but you’ll need a few extra tools:
- Power drill with drill bits
- Adjustable wrench or socket set
- Hammer or mallet
- Measuring tape
- Carpenter’s level
- Shovel (for ground prep and anchoring)
- Ladder
- Safety goggles and gloves
Additionally, you’ll need materials like anchors, ground stakes, and surface covering (wood mulch, sand, or rubber mats). Organizing everything in advance ensures you won’t waste time running back and forth to the hardware store in the middle of assembly.
Safety Precautions Before You Begin
Safety should always come first. Before starting the installation, double-check that children and pets are at a safe distance. Wear protective gear like gloves and goggles while handling tools, especially during drilling or anchoring. If you’re working with heavy beams, ask for help—swing sets are not a one-person project.
Read the instruction manual thoroughly before beginning. Many people skip this step, but every swing set model has unique assembly requirements. Misplacing a single bolt or skipping a safety check can make the entire structure unstable.
Finally, pace yourself. Installing a swing set often takes 6–10 hours, depending on complexity and experience. Don’t rush the process; take breaks when needed and ensure every step is completed properly before moving to the next.
✅ Related Articles
- 10 Best Heavy-Duty Swing Sets for Older Kids | Tested
- 2026’s Best Swing Sets for Kids | Top 10 Picks Parents Love
- The Truth About Swing and Slide Combo Playsets | Pros, Cons
- 10 Must-Have Playsets for Kids | Perfect for Small Backyards
How to Install a Swing Set – Step 1: Ground Preparation
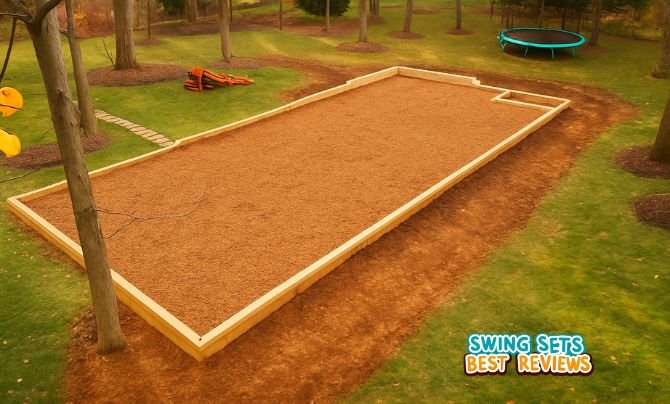
Ground preparation is where many installations go wrong. Uneven or soft ground can cause a swing set to wobble, sink, or shift over time. Proper groundwork ensures the structure remains stable and safe for years to come.
Clearing and Leveling the Ground
Start by clearing the area of rocks, sticks, and debris. If the grass is thick, you may want to remove the sod completely so you have a clean surface to work with. Next, level the ground as much as possible. Even a small slope can cause stability issues, so use a carpenter’s level to check multiple points across the installation site.
If the ground is uneven, you may need to dig down high spots or use topsoil to fill in low areas. Compact the soil afterward so it’s firm and stable. This step takes effort but pays off in the long run.
Marking the Area for Installation
Once the ground is level, mark the layout using spray paint, stakes, or chalk. Outline the footprint of the swing set plus the extra clearance space (6–8 feet around all sides). This visual guide helps you stay aligned during installation and prevents misplacement.
Soil Type Considerations
Not all soil types are created equal. Sandy or loose soil may not hold anchors well, while clay-heavy soil may shift when wet. If your soil is too soft, you may need to reinforce it with concrete footings or ground mats. For best results, aim for well-packed soil that drains properly.
How to Install a Swing Set – Step 2: Assembling the Frame
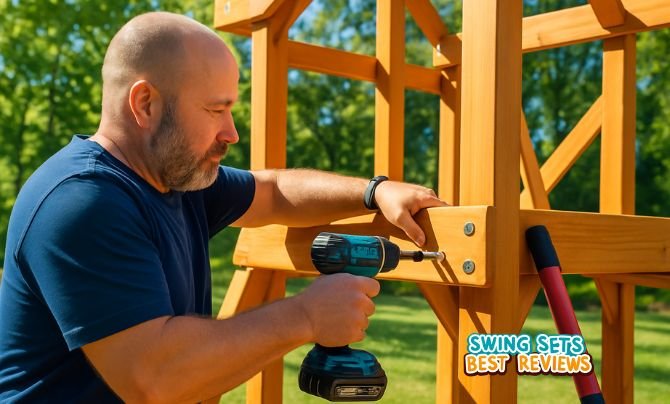
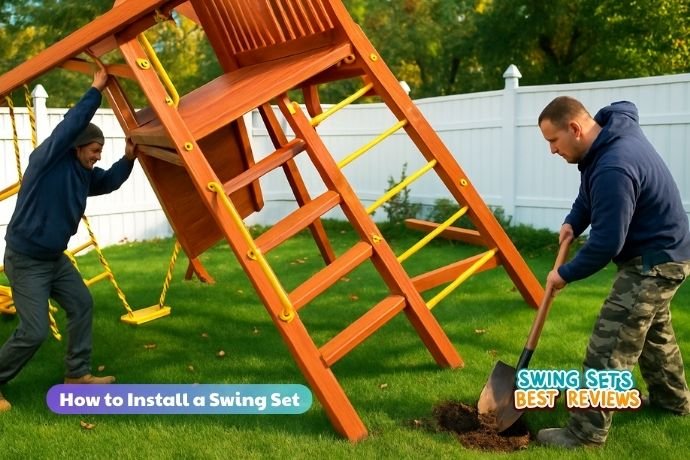
Once your ground is ready, the fun begins: assembling the swing set frame. This step can be challenging since most frames involve large, heavy beams, but it’s also the most rewarding as your project starts to take shape.
Laying Out Swing Set Parts
Before picking up tools, unpack all the pieces and lay them out neatly on the ground. Group parts by type (beams, brackets, bolts, swings, etc.) so you don’t waste time searching during assembly. Check the instruction manual carefully and verify that no pieces are missing—contact the manufacturer immediately if something is.
Connecting the Main Beams and Support Legs
Begin with the main horizontal beam that will hold the swings. Attach the support legs using the provided brackets or bolts, tightening them just enough to hold in place. You’ll fully secure them once the frame is upright.
It’s usually best to have at least two people for this stage—one to hold the beam steady while the other attaches the legs. If your swing set includes additional features like monkey bars or climbing walls, assemble these frame sections separately before connecting them to the main structure.
Ensuring Frame Stability
Once the frame is upright, check for wobbling or uneven joints. Use a carpenter’s level to ensure the top beam is perfectly horizontal. Tighten all bolts securely but avoid over-tightening, which could strip the wood or damage the metal brackets.
At this point, your swing set should be standing, but it’s not yet ready for play until it’s anchored.
How to Install a Swing Set – Step 3: Anchoring the Swing Set
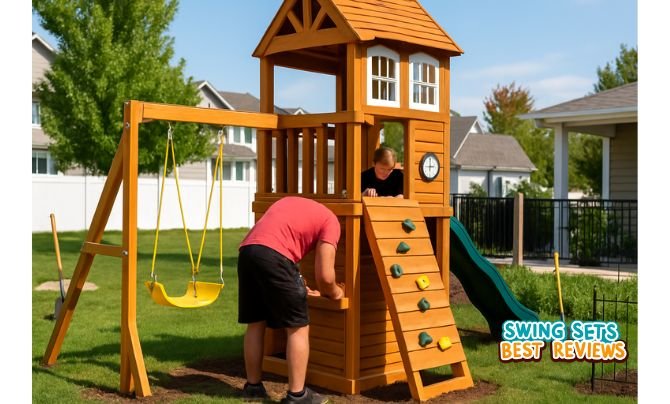
Anchoring is what makes the difference between a safe swing set and a dangerous one. Without anchors, even the sturdiest structure can tip over during heavy use or high winds.
Why Anchoring is Important for Safety
Every time a child swings, they generate forward and backward momentum that transfers into the swing set frame. Without proper anchoring, that force can cause the legs to lift off the ground or shift sideways. Anchors keep the frame firmly planted, reducing the risk of accidents.
Types of Anchors You Can Use
There are several anchoring options depending on your soil and swing set design:
- Ground stakes: Best for soft soil; easy to install but may loosen over time.
- Corkscrew anchors: Twist deep into the ground for extra holding power.
- Concrete footings: The most secure option, especially for larger swing sets, though more labor-intensive.
Step-by-Step Guide to Anchoring
- Position the anchor near each leg of the swing set.
- Drive or twist the anchor deep into the ground (at least 12 inches).
- Attach the anchor to the leg using the provided brackets or bolts.
- Double-check that all anchors are secure and evenly placed.
For maximum safety, test the swing set by applying weight and rocking it slightly. If there’s any movement, reinforce with additional anchors or concrete.
How to Install a Swing Set – Step 4: Attaching Swings and Accessories
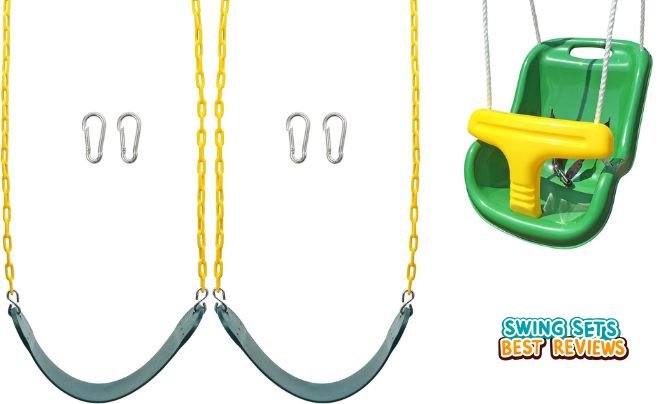
Once the frame is assembled and anchored securely, it’s time to bring your swing set to life by adding swings, slides, climbing walls, and other exciting features. This stage is often the most fun because you start to see the finished product coming together. However, it’s also one of the most critical stages for safety, as improper installation of accessories can lead to accidents.
Installing Swings, Slides, and Climbing Features
Begin by installing the swings themselves. Most swing sets come with pre-drilled holes in the top beam where swing hangers or hooks can be mounted. Make sure these are spaced evenly apart to prevent swings from colliding. Attach the hangers securely, ensuring they can rotate freely without friction. Once installed, hook the swing chains or ropes to the hangers, making sure the seat hangs at a safe and comfortable height for children.
Slides and climbing features often require separate assembly before being attached to the main structure. For slides, ensure the top is securely fastened to the platform, and the bottom rests firmly on the ground. If the slide wobbles, use stakes or braces for additional stability. For climbing walls or rope ladders, double-check that all fasteners are tightly secured, as these features will experience a lot of pulling and weight-bearing during play.
Adding accessories like trapeze bars, monkey bars, or tire swings should also follow the manufacturer’s instructions precisely. Each of these components puts stress on the frame, so correct placement and attachment are essential.
Securing Bolts and Fasteners Properly
During this stage, go through every bolt, screw, and fastener, and make sure they’re tightened properly. Loose hardware is one of the leading causes of swing set accidents. However, avoid over-tightening, especially with wooden sets, as this can cause splitting or warping.
Many swing sets come with protective caps for bolts, which not only prevent loosening but also protect children from scratches and cuts. Make sure every exposed bolt is covered with these caps for added safety.
Testing Each Attachment for Safety
Once all swings and accessories are installed, give each one a thorough test. Pull on swing chains with your full body weight to ensure they don’t slip or bend. Slide down the slide yourself (if it’s sturdy enough) to check for stability. Climb the rock wall or rope ladder to ensure it can handle stress without shifting.
This is not just about checking functionality—it’s about confirming safety before allowing children to use the swing set. It’s better to discover a weak connection during testing than after kids start playing.
How to Install a Swing Set – Step 5: Final Safety Checks
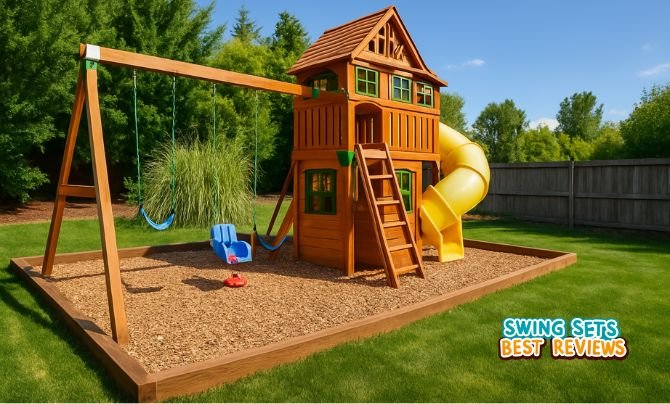
Before you call the job done, you’ll need to perform a comprehensive safety inspection. Even if everything looks fine at first glance, small mistakes—like a slightly loose bolt or an uneven leg—can lead to big problems later.
Inspecting for Sharp Edges or Loose Bolts
Go over every inch of the swing set with a critical eye. Check for:
- Loose bolts or screws – tighten them securely.
- Sharp edges or corners – cover them with protective caps.
- Splintering wood – sand down rough areas to prevent injuries.
- Metal parts – ensure there’s no rust or bending.
Children will explore every inch of the playset, so even a small sharp edge can cause cuts or scrapes. Don’t overlook any detail during this inspection.
Testing the Swing Set with Weight
The best way to ensure stability is to simulate real use. Sit on the swings and apply your full weight. Rock the frame slightly to check for movement. Climb the ladder, slide, and any other accessories. If the structure creaks, wobbles, or shifts in the ground, it may need additional tightening or anchoring.
Testing with adult weight gives you confidence that the swing set can handle the lighter loads from children without issue.
Ongoing Maintenance Tips
Installing the swing set is just the beginning. To keep it safe and long-lasting, you’ll need to perform regular maintenance:
- Monthly checks – inspect bolts, anchors, and swing chains.
- Seasonal checks – look for rust, wood rot, or fading materials.
- Surface checks – replenish mulch, sand, or rubber mats as needed.
- Weather checks – after storms, verify that anchors and fasteners are still secure.
A little routine maintenance ensures your swing set remains safe for years of family fun.
Common Mistakes to Avoid When Installing a Swing Set
Even with the best intentions, many DIY swing set installations go wrong because of avoidable mistakes. Recognizing these pitfalls ahead of time will help you steer clear of them.
Skipping the Anchoring Process
This is the single most dangerous mistake people make. A swing set that isn’t anchored may seem stable when first installed, but the moment kids start swinging, it can tip or slide. Anchoring is not optional—it’s essential for safety.
Choosing an Uneven or Unsafe Location
Placing a swing set on uneven ground leads to instability and wobbling. Similarly, putting it too close to fences, trees, or hard surfaces like concrete increases the risk of accidents. Always choose a level, open space with soft ground covering.
Rushing Through the Instructions
Many accidents happen because installers skimmed through the manual instead of reading it carefully. Every swing set has specific requirements, and skipping even a single step can compromise safety. Take your time, follow instructions precisely, and double-check your work at each stage.
Safety Tips for Kids Using a Swing Set
Once your swing set is fully installed and tested, it’s time for the fun part—letting the kids enjoy it! However, even the safest swing set requires rules and supervision to prevent accidents.
Age-Appropriate Usage Guidelines
Not all swing sets are designed for all ages. For toddlers, bucket swings and lower slides are safer, while older kids can enjoy climbing walls and higher swings. Always follow the manufacturer’s age recommendations for each accessory.
If you have kids of different ages, consider setting boundaries—for example, toddlers should not use swings designed for older children, as the height and speed may be unsafe for them.
Rules to Teach Kids for Safe Play
Establishing ground rules will make playtime safer. Some key rules include:
- Only one child per swing at a time.
- Never walk in front of or behind someone swinging.
- Hold on with both hands while swinging or climbing.
- No roughhousing, pushing, or jumping off swings.
- Always slide feet first, never head first.
Parents should also supervise play whenever possible. Even older kids can sometimes forget the rules in the excitement of play, so gentle reminders help reinforce safe habits.
👉 You Might Be Interested In
- Best Outdoor Climbing Toys for Kids Under 5
- 10 Best Budget Swing Sets Under $500 That Parents Love
- Premium Wooden Swing Sets | The Ultimate Backyard Upgrade in 2026
- 10 Must-Have Playsets for Kids | Perfect for Small Backyards
- Swing Set Safety Tips Every Parent Must Know | Ultimate Guide
DIY vs. Professional Install A Swing Set
When deciding how to install a swing set, one of the biggest questions parents face is whether to take on the project themselves or hire a professional. Both approaches have their pros and cons, and the right choice depends on your budget, time, and level of confidence with DIY projects.
Pros and Cons of Install A swing Set It Yourself
Pros of DIY Installation:
- Cost savings – Installing it yourself can save hundreds of dollars compared to hiring a professional.
- Personal satisfaction – There’s a sense of pride and accomplishment in knowing you built your child’s playset with your own hands.
- Flexibility – You can work at your own pace, taking breaks or splitting the project over a few days.
Cons of DIY Installation:
- Time-consuming – Depending on the complexity, DIY installation can take 6–12 hours or even multiple days.
- Challenging for beginners – If you’re not comfortable with tools or reading instructions, it may become frustrating.
- Risk of errors – Mistakes in assembly or anchoring can compromise safety.
If you’re handy, patient, and enjoy DIY projects, building your own swing set can be very rewarding. But if you’re short on time or unsure of your skills, you may want to consider professional help.
When to Hire a Professional Installer
Hiring a professional can save time and ensure peace of mind. Installers are experienced with assembling different types of swing sets, which means fewer mistakes and faster completion.
You should consider professional installation if:
- You purchased a large or complex swing set with multiple features.
- You don’t have the tools required for assembly.
- You want the swing set installed quickly, perhaps as a surprise gift.
- You want to ensure maximum safety without second-guessing your work.
The main drawback of hiring a pro is cost, but many parents find it worth the investment for safety and convenience.
Cost of Installing a Swing Set
Installing a swing set can be affordable or quite expensive depending on whether you go the DIY route or hire professionals. Understanding the costs upfront helps you plan your budget better.
Average DIY Costs
If you’re doing it yourself, here’s what you might expect to spend:
- Swing set kit: $300 – $2,000+ depending on size and materials.
- Tools and supplies: $50 – $150 (if you don’t already own basic tools).
- Ground covering (wood chips, sand, or rubber mulch): $100 – $400 depending on yard size.
So, a DIY installation could range between $450 – $2,500, with the biggest factor being the swing set itself.
Professional Installation Costs
Professional installers typically charge between $200 – $800 for labor, depending on complexity. If the swing set requires concrete footings, landscaping adjustments, or custom modifications, costs may go higher.
Adding professional installation on top of the swing set and ground materials means your total cost could range from $700 – $3,500 or more.
While DIY is cheaper, hiring a professional may be worth the extra cost if you want guaranteed safety and a faster setup.
Maintenance and Care for Your Swing Set
Installing the swing set is just the beginning. To ensure it lasts for years and stays safe, regular maintenance is essential. A neglected swing set can quickly become unsafe due to rust, rot, or loose bolts.
Seasonal Maintenance Checklist
Here’s a simple seasonal checklist to keep your swing set in top condition:
Spring:
- Inspect for rust, loose bolts, or splintered wood.
- Reapply protective sealant on wooden sets if needed.
- Refresh ground covering for safety cushioning.
Summer:
- Check for fading or cracking plastic parts from sun exposure.
- Tighten bolts after heavy play periods.
Fall:
- Clear leaves and debris from around the swing set.
- Check anchors before wet weather loosens soil.
Winter:
- Cover or store removable accessories like swings and ropes.
- Inspect for snow or ice damage if exposed year-round.
Repairing and Replacing Worn Parts
Swing sets endure a lot of wear and tear. Chains can rust, wood can crack, and slides can warp over time. Replacing small parts like swing seats or fasteners is inexpensive and extends the life of your swing set.
Always use manufacturer-approved replacement parts to ensure compatibility and safety. If major components like the main beam or support legs become damaged, it may be time to consider replacing the entire set.
Benefits of Installing a Swing Set at Home
Beyond being a fun backyard addition, a swing set offers many long-term benefits for children and families.
Physical and Mental Benefits for Kids
Swinging, climbing, and sliding provide excellent physical exercise, helping kids build strength, balance, and coordination. It’s also a great way to burn energy, which improves sleep and concentration.
Mentally, outdoor play boosts creativity, problem-solving skills, and confidence. The simple act of swinging has even been shown to have calming effects on children, reducing stress and anxiety.
Family Bonding and Outdoor Fun
A backyard swing set encourages family time outdoors. Parents can join in on the fun, supervise easily, and create lasting memories. It also makes your home the go-to spot for neighborhood playdates, fostering social interaction and friendships for your kids.
Unlike electronic entertainment, a swing set promotes real-world engagement and active play. It’s an investment that pays off in both health and happiness.
Conclusion
Learning how to install a swing set properly ensures your kids can enjoy years of safe, fun outdoor play. From choosing the right location to anchoring securely and performing final safety checks, every step matters. Whether you decide to DIY or hire a professional, the goal is the same—building a play area that is safe, durable, and fun.
With proper installation, regular maintenance, and safe play rules, your swing set will not only transform your backyard but also create memories your family will cherish for years.
FAQs
1. How long does it take to install a swing set?
Most swing sets take between 6–12 hours to install, depending on size and complexity.
2. Can I install a swing set on uneven ground?
It’s not recommended. Level the ground first or use a ground leveling kit to ensure stability.
3. Do swing sets need to be cemented into the ground?
For maximum safety, especially with larger sets, concrete footings are highly recommended.
4. How often should I check my swing set for safety?
Do a quick check monthly and a thorough inspection seasonally to keep it in top condition.
5. Is it cheaper to build or buy a swing set?
Buying a pre-made swing set is usually cheaper and safer than building from scratch unless you’re highly skilled in carpentry.


