Every child dreams of having a magical little space of their own—a playhouse where imagination comes alive. For parents, however, the price tag of a store-bought playhouse can be overwhelming. That’s where DIY playhouse ideas for budget-friendly parents come in to save the day. Not only can you save money, but you’ll also create something meaningful with your own hands. Plus, your kids will cherish the effort and creativity that went into making their playhouse.
DIY playhouses are not just budget-friendly, they are customizable too. You get to decide on the design, size, and materials, which means you can tailor it to your child’s interests and the available space you have. Whether it’s a fairy-tale cottage, a pirate ship fort, or a mini rustic cabin, the possibilities are endless—and you don’t have to spend thousands of dollars to bring them to life.
This guide will cover everything from affordable materials to step-by-step construction, indoor and outdoor playhouse ideas, decoration tips, and even ways to involve your kids in the process. With practical tips and creative suggestions, you’ll be ready to start building a beautiful playhouse without stretching your wallet too thin.
So, if you’ve been searching for ways to balance affordability and creativity while giving your kids a dream space, you’re in the right place. Let’s dive into the wonderful world of DIY playhouse ideas that are easy on the budget and big on fun!
Why a DIY Playhouse is the Perfect Choice for Kids
Benefits of Having a Playhouse at Home
A playhouse is more than just a miniature structure—it’s a world where kids can create stories, host tea parties, pretend to be explorers, or even run their own little shops. Playhouses encourage role play, imagination, and social interaction. Unlike electronic toys, a playhouse promotes active play and gets children moving, crawling, climbing, and exploring. This kind of play helps in developing motor skills and cognitive growth while keeping kids entertained for hours.
Playhouses also provide kids with a sense of independence. Having a space that belongs to them makes children feel responsible and creative, teaching them to respect their own belongings. It’s like their very first little “home,” where they can decorate, organize, and create rules.
Why DIY Saves Money Compared to Store-Bought Options
Store-bought playhouses can easily cost anywhere from $300 to $2,000 depending on size and quality. For many families, this is not a realistic option. With DIY playhouses, you can cut costs significantly. By using recycled or repurposed materials, many parents have successfully built playhouses for under $100. On top of that, a DIY project gives you the freedom to avoid cheap, flimsy plastics and instead build something sturdier and longer-lasting.
Encouraging Creativity Through DIY Projects
When kids see you building something from scratch, they learn an important lesson: creativity is more valuable than money. By involving them in the process—letting them paint, choose colors, or even help with safe tasks—you spark their imagination and problem-solving skills. A DIY playhouse is not just a play space; it’s a family project that strengthens bonds and creates lasting memories.
Planning Your DIY Playhouse Project on a Budget
Setting a Realistic Budget
Before you pick up a hammer or paintbrush, sit down and decide how much you’re willing to spend. A small cardboard playhouse could cost almost nothing, while a sturdier outdoor wooden structure may require $100–$300 for basic supplies. Knowing your budget in advance helps you avoid overspending and ensures that the project remains stress-free.
One great way to save money is to plan your playhouse in phases. Start with the basic structure and add decorative touches later as your budget allows. For example, build the walls and roof first, and then add curtains, rugs, and lighting over time.
Choosing the Right Size and Design
The size of your playhouse should match the space you have available. A large backyard gives you more options for a bigger playhouse, while a small indoor space might be better suited for a tent-style or cardboard playhouse. Keep in mind your child’s age too—a toddler doesn’t need a massive structure, while older kids may appreciate something roomier.
Design is another factor. Simple square or rectangular playhouses are much easier and cheaper to build compared to elaborate castle-style designs. That said, you can still get creative with paint, fabric, and decorations without spending much.
Picking a Safe Location in Your Backyard
If you’re building outdoors, choose a flat, stable area where water doesn’t collect. Avoid placing the playhouse too close to fences, trees, or sharp objects. Shade is also important—nobody wants a playhouse that turns into an oven in the summer! For indoor playhouses, make sure the chosen spot allows enough room for movement without blocking essential areas of your home.
Affordable Materials for Building a Playhouse
Recycled and Repurposed Wood
Wood is the go-to material for most DIY playhouses. If you don’t want to spend money on brand-new lumber, check local construction sites, online marketplaces, or recycling centers where leftover wood is often available for free or at a very low cost. Old wooden crates, fencing, or doors can be repurposed to form the structure of your playhouse.
Using Pallets for a Rustic Look
Pallets are a budget-friendly parent’s best friend. They’re sturdy, easy to work with, and often available for free at local stores or warehouses. With a little sanding and creativity, pallets can be transformed into walls, floors, or even furniture for your playhouse. The rustic look of pallets also adds a charming touch, making the playhouse feel cozy and unique.
Other Low-Cost Materials You Can Use
Aside from wood, there are many affordable materials to consider. Cardboard is excellent for indoor playhouses—it’s lightweight, customizable, and practically free. Fabric can be used for tents or drapes, adding a playful touch without costing much. PVC pipes are another great option for building lightweight frames, especially if you’re aiming for a flexible design.
The key to keeping costs low is creativity. Look around your home—you may already have unused furniture, curtains, or scrap wood that can be repurposed into your child’s dream playhouse.
✅ Related Articles
- How to Install a Swing Set: Step-by-Step Guide
- The Truth About Swing and Slide Combo Playsets | Pros, Cons
- 2026’s Best Swing Sets for Kids | Top 10 Picks Parents Love
Simple and Creative DIY Playhouse Ideas for Budget-Friendly Parents
The Classic Wooden Playhouse
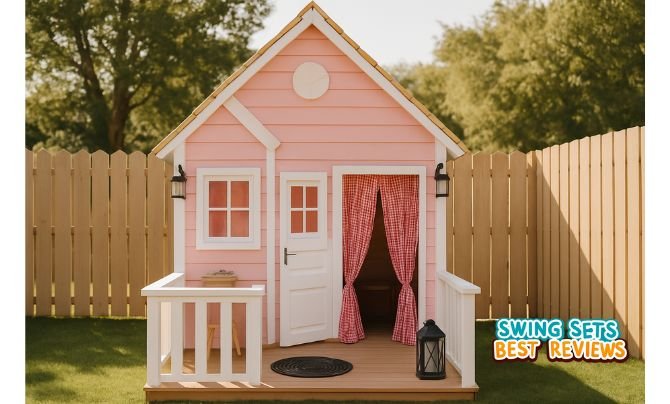
A small wooden playhouse never goes out of style. With basic lumber or pallets, you can build a sturdy, weather-resistant structure that your kids can enjoy year-round. Add a little porch, a window with shutters, and maybe even a mailbox to make it feel like a real home.
Playhouse Made from Cardboard or Fabric
For parents who want something quick, easy, and nearly free, cardboard and fabric playhouses are perfect. Large appliance boxes can be cut and painted to resemble castles, cottages, or even rocket ships. Fabric tents made from old sheets or curtains draped over a frame can create a cozy indoor retreat for kids.
Pallet Playhouse for Minimal Cost
If you have access to free pallets, you’re already halfway to building a playhouse. Stack and secure pallets together for walls, add a roof with plywood, and you’ve got yourself a rustic, eco-friendly play space. With some sanding and a coat of paint, it can look surprisingly professional.
Upcycling Old Furniture into a Playhouse
One of the most creative ideas is turning old furniture into a playhouse. An unused wardrobe can be converted into a mini house with a door and windows. Old bunk beds can be transformed into a loft-style playhouse. The best part? You’re giving new life to furniture that might otherwise end up in the trash.
Step-by-Step Guide to Building a Basic DIY Playhouse
Tools You’ll Need for Construction
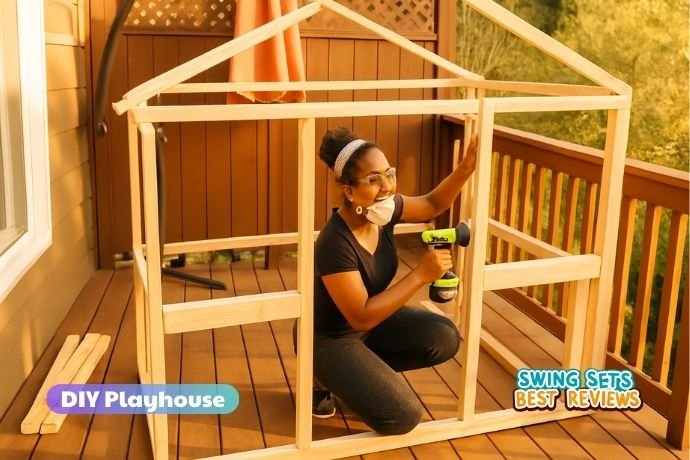
Before starting your project, make sure you gather all the essential tools. You don’t need a full workshop to build a playhouse, but having the basics will make the process smoother. A hammer, nails, and screws are must-haves. A measuring tape, level, and carpenter’s square will help you ensure accuracy in your cuts and assembly. A hand saw or circular saw will be needed if you’re working with wood, while a drill will make fastening everything together much easier.
If you’re working with pallets, you’ll also need a crowbar or pry tool to disassemble them safely. Sandpaper or a power sander is crucial to smooth rough edges, keeping the playhouse safe for kids. For painting and finishing, gather paintbrushes, rollers, and child-safe paint. Don’t forget protective gear like gloves, goggles, and a dust mask—safety should always come first.
Having these tools on hand ensures that you can build confidently and without interruptions. Many parents are surprised to learn that most of these tools can be borrowed from friends, neighbors, or even local tool-lending libraries—helping you keep costs down.
Building the Base and Walls
Every strong playhouse starts with a solid foundation. If you’re building outdoors, consider raising the base slightly off the ground using concrete blocks or pallets to prevent moisture damage. For indoor playhouses, a simple wooden floor frame or even a rug base will work just fine.
Next, frame the walls using lightweight lumber or pallet slats. Start with two side walls, then the back wall, before finally attaching the front wall. Cut out window openings as you build, leaving room for simple shutters or curtains later on. Remember, the walls don’t need to be tall; a height of 4–6 feet is usually enough for kids while keeping materials affordable.
Adding the Roof and Finishing Touches
A slanted roof is the easiest option for beginners, as it prevents rainwater from collecting while giving the playhouse a charming look. Use plywood or pallet boards for the roof, then cover it with shingles, waterproof fabric, or even corrugated metal sheets. For a budget-friendly option, paint the roof with weather-resistant paint instead of using expensive roofing materials.
The finishing touches are what truly bring the playhouse to life. Add simple doors, paint fun colors, and maybe even attach a chalkboard or mailbox outside. Once complete, step back and admire your work—you’ve just built a magical space for your kids without overspending!
Decorating Your DIY Playhouse on a Budget
Painting and Adding Colorful Details
A coat of paint can completely transform your playhouse from plain wood into a magical castle, a cozy cottage, or even a pirate ship. The best part? Paint is relatively inexpensive, and you don’t need much to cover a small structure. Choose child-safe, non-toxic paints, especially if your kids will be spending a lot of time inside. Bright colors make the playhouse inviting, while themes like pastel cottages or bold superhero hideouts let kids use their imaginations.
Adding details like painted flowers, stars, or animals on the walls enhances the theme. You can even let your kids participate in the painting process, giving them ownership and pride in their new playhouse.
DIY Curtains, Rugs, and Cushions
You don’t need fancy décor items—many of these can be made from things you already have at home. Old bed sheets can be cut into curtains, rugs can be repurposed from old fabric scraps, and cushions can be made from worn-out pillows. These soft touches make the playhouse cozy and inviting, encouraging kids to spend more time inside.
Creative Themes Kids Will Love
One way to maximize excitement is by designing the playhouse around a theme. For example:
- Fairy-tale cottage – with pastel paint and flower garlands.
- Pirate ship fort – with a makeshift mast, flag, and treasure chest.
- Mini café or shop – complete with a small counter and chalkboard menu.
- Space station – with metallic paint and glow-in-the-dark stickers.
Decorations don’t have to be expensive; sometimes the simplest DIY additions create the most magic.
Safety Tips for DIY Playhouses
Choosing Child-Safe Materials
When building for kids, safety should always come first. Avoid using treated wood that may contain chemicals harmful to children. Instead, go for natural, untreated wood and seal it with non-toxic finishes. If using paint, ensure it’s labeled safe for children and doesn’t contain lead or other harmful substances.
Preventing Sharp Edges and Splinters
Before letting your kids play inside, do a thorough inspection. Sand down all wooden surfaces to remove splinters, and cover any exposed nails or screws with caps. Rounded edges are safer than sharp corners, so consider sanding corners smooth or adding protective covers.
Weatherproofing for Outdoor Playhouses
If your playhouse will be outdoors, weatherproofing is essential. A simple waterproof sealant or outdoor-grade paint can go a long way in protecting the structure from rain and sun damage. You can also add a tarp or small awning over the roof to extend its lifespan. Keeping the playhouse elevated slightly above ground prevents flooding or rot.
Fun Accessories to Add to Your DIY Playhouse
Mini Furniture and Tables
What’s a playhouse without furniture? Luckily, you don’t need to spend much. Old stools can double as chairs, while crates make perfect little tables. Even shoeboxes can be decorated and used as shelves for toys. Kid-sized furniture creates a cozy home-like feel and encourages pretend play.
Adding a Sandbox or Slide
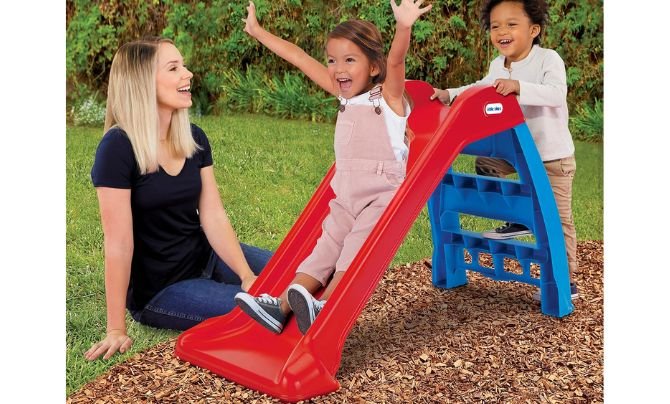
If you have some extra space outdoors, adding a sandbox or slide instantly upgrades the playhouse experience. A sandbox can be made from a simple wooden box filled with play sand, while a small plastic slide can be attached to the side for hours of fun. These additions turn a simple playhouse into a mini playground.
DIY Playhouse Lighting Options
Lighting can make the playhouse magical. For indoor playhouses, string fairy lights or battery-operated lanterns are safe and budget-friendly. For outdoor playhouses, solar-powered lights are a great eco-friendly option. Avoid using electrical cords inside playhouses, as they pose safety hazards. Instead, opt for simple, portable lighting options that create a warm and cozy atmosphere.
Indoor DIY Playhouse Ideas for Small Spaces
Cardboard Castles and Forts
For parents with limited space indoors, cardboard playhouses are the ultimate budget-friendly solution. Large boxes from appliances can be cut into castle towers, windows, and doors. Kids can then decorate them with markers, stickers, or paint. The best part is that cardboard playhouses can be folded and stored when not in use.
Playhouse Tents and Fabric Designs
A playhouse doesn’t always have to be built from wood. With a few poles or PVC pipes and old bedsheets, you can create a cozy indoor tent-style playhouse. Add fairy lights, soft cushions, and a rug to make it an inviting reading nook or pretend camping site.
Transforming a Closet into a Playhouse
If you have an unused closet or a small storage space, you can turn it into a hidden playhouse. Add some cushions, hang up curtains, and maybe install a small light inside. This kind of playhouse is perfect for small homes where space is limited but creativity is endless.
Outdoor DIY Playhouse Ideas for Budget-Friendly Parents
Treehouse-Inspired Playhouses
Not every family has the right kind of tree for a full treehouse, but you can still design a playhouse that captures the same adventurous spirit. By building a raised platform just a few feet off the ground, supported by sturdy posts, you can create a safe and exciting elevated playhouse. Add a ladder, small balcony railing, and maybe even a rope or tire swing nearby for extra fun.
Treehouse-style playhouses spark imagination—they can be pirate lookout towers, forest forts, or secret hideouts. Best of all, they don’t need to be expensive. By using reclaimed wood and pallets, many parents manage to create elevated playhouses for under $200. Just make sure to prioritize safety by reinforcing the base and installing railings high enough to prevent falls.
Playhouses with Swings and Slides
If you want to take your outdoor playhouse to the next level, consider combining it with swings and slides. While store-bought playsets can cost a fortune, you can build a budget-friendly version yourself. By attaching a simple wooden swing frame to the playhouse and adding a slide (many parents find used plastic slides online for cheap), you instantly transform the playhouse into a mini playground.
This design not only saves space but also maximizes fun, as kids can switch between pretend play and active play without leaving the backyard.
Garden-Themed Playhouses
For parents who love gardening, why not create a playhouse that doubles as a mini greenhouse or garden shed? A simple wooden playhouse can be painted green and decorated with potted plants, flower boxes, or even climbing vines. Kids will love pretending to be gardeners while learning how to care for plants. This type of playhouse also blends beautifully into your outdoor space, making it functional for both kids and parents.
👉 You Might Be Interested In
- Metal vs Wooden Swing Sets: Which is Better for Kids?
- Best Outdoor Climbing Toys for Kids Under 5
- 10 Must-Have Playsets for Kids | Perfect for Small Backyards
- Swing Set Safety Tips Every Parent Must Know | Ultimate Guide
- 10 Best Budget Swing Sets Under $500 That Parents Love
Teaching Kids to Help Build Their Playhouse
Age-Appropriate Tasks for Children
One of the most rewarding aspects of DIY projects is involving your kids in the building process. Of course, their level of participation depends on their age. Younger kids can help with painting, decorating, or passing small tools, while older kids can assist with sanding, measuring, or even screwing in lightweight parts under supervision.
By giving kids age-appropriate tasks, you’re not only keeping them engaged but also teaching them responsibility and basic building skills. They’ll feel proud knowing they helped create something with their own hands.
Encouraging Creativity Through Decoration
Once the main structure is complete, let your kids take the lead in decorating. Provide them with paints, markers, stickers, or fabric scraps, and encourage them to personalize their playhouse. This step is essential because it gives them ownership of the space and helps boost their creativity. A playhouse they helped decorate becomes more than just a toy—it becomes a special memory.
Building Skills and Confidence Together
Working on a DIY playhouse is not only about saving money; it’s also about bonding as a family. Kids who take part in the process learn teamwork, patience, and problem-solving skills. They also gain confidence by seeing their contributions come to life. It’s a beautiful reminder that building something together as a family is more valuable than buying something ready-made from a store.
Maintaining Your DIY Playhouse on a Budget
Cleaning and Upkeep Tips
Playhouses, like any other structure, need regular maintenance. Indoor playhouses should be dusted and vacuumed occasionally, while outdoor ones may need sweeping and washing. Encourage your kids to help keep their playhouse clean by making it part of playtime. For example, they can pretend to be homeowners taking care of their little house.
Repairing Wear and Tear
Wooden playhouses may develop loose nails, splinters, or weak spots over time. Make it a habit to check for any safety hazards every few months. Small issues like loose boards can usually be fixed with screws or wood glue, while worn-out fabric curtains or rugs can be replaced with inexpensive scraps.
Seasonal Maintenance for Outdoor Playhouses
Outdoor playhouses face challenges from weather, so seasonal care is essential. In the summer, ensure the roof provides enough shade and repaint surfaces to prevent fading. In the winter, consider covering the playhouse with a tarp or storing removable parts like cushions indoors. Proper maintenance ensures that your budget-friendly playhouse lasts for years, giving your kids endless hours of fun.
Inspiring Real-Life DIY Playhouse Ideas from Parents
Budget Playhouses Built with $100 or Less
Believe it or not, many parents have created stunning playhouses on very tight budgets. Some use free pallets, leftover paint, and donated wood to build structures that rival store-bought versions. Online parenting communities are full of examples where families spent under $100 and still managed to create magical little homes for their kids.
Creative Upcycled Playhouses
One of the best money-saving strategies is repurposing old items. Parents have transformed everything from wooden crates and wardrobes to bunk beds into amazing playhouses. These creative upcycling projects prove that with imagination, almost anything can be turned into a play space. Not only does this save money, but it also teaches kids about sustainability and recycling.
Themed Playhouses Kids Never Want to Leave
From pirate ships and space stations to mini cafés and fairy cottages, themed playhouses are among the most popular DIY projects. Parents who take the extra time to decorate and personalize their playhouses often find that their kids spend countless hours inside, using their imaginations instead of screens. These real-life examples serve as proof that you don’t need a big budget to create something extraordinary.
Final Thoughts on DIY Playhouse Ideas for Budget-Friendly Parents
Building a DIY playhouse isn’t just about creating a fun structure for kids—it’s about building memories, teaching life skills, and saving money in the process. By choosing affordable materials, planning carefully, and involving your kids, you can create a magical little space that they’ll cherish for years to come.
Whether you build a simple cardboard playhouse, a rustic pallet cabin, or an elaborate outdoor fort, the key is creativity. The joy on your children’s faces when they step into their new playhouse will be worth every bit of effort. So grab those tools, gather some recycled materials, and start building your child’s dream playhouse today—without breaking the bank.
FAQs on DIY Playhouse Ideas for Budget-Friendly Parents
How much does it cost to build a DIY playhouse?
The cost of building a DIY playhouse depends on the design, materials, and whether you already own some tools. On the lower end, if you use free pallets, recycled wood, or cardboard, you could spend less than $50. Many creative parents have built charming playhouses for under $100 by repurposing old furniture, using leftover paint, and sourcing materials locally for free.
On the higher end, if you’re aiming for a sturdier wooden outdoor playhouse with a roof, windows, and a few fun accessories like slides or swings, expect to spend around $200–$500. This is still significantly cheaper than store-bought models, which often start at $400 and can go up to $2,000 or more.
The beauty of DIY projects is flexibility. You don’t have to complete everything at once. You can start with the base and walls, then add decorative elements or furniture later as your budget allows. This phased approach helps spread out expenses and keeps the project affordable.
In short, whether you’re spending $50 or $500, a DIY playhouse can always be tailored to fit your budget while still delivering hours of fun for your kids.
What is the cheapest material for a DIY playhouse?
The cheapest and most widely available material for a DIY playhouse is cardboard. Large boxes from appliances like refrigerators or washing machines can be repurposed into castles, cottages, or forts. With a little paint and creativity, cardboard playhouses can look surprisingly impressive—and they’re practically free.
Another incredibly cost-effective option is wood pallets. Many warehouses, hardware stores, and supermarkets give them away for free. With sanding and a bit of cutting, pallets can be turned into walls, floors, and even mini furniture. They’re sturdy, eco-friendly, and perfect for rustic playhouse designs.
Fabric tents are another low-cost choice. Using old sheets, curtains, or blankets, you can drape fabric over a frame made from PVC pipes or broomsticks. This type of playhouse is lightweight, easy to store, and great for indoor spaces.
If you want something sturdier but still cheap, consider repurposing old furniture. An unused wardrobe, bunk bed, or wooden crate can be transformed into a mini playhouse with minimal effort. The best part is that these materials often come at no cost since they’re items you already own.
Can I build a DIY playhouse without power tools?
Yes, it’s absolutely possible to build a DIY playhouse without power tools, although it may take more time and effort. For simple cardboard or fabric playhouses, you won’t need anything more than scissors, tape, and paint. These options are perfect for parents who don’t have access to woodworking tools or prefer a quick, hassle-free project.
If you want a sturdier wooden playhouse but don’t own power tools, you can still manage with basic hand tools like a hammer, nails, handsaw, and screwdriver. While this approach will be slower, it can be just as effective. Pre-cut wood from hardware stores can save you time if you don’t want to do the cutting yourself.
Another great alternative is to buy or salvage pallet wood, which is often already in manageable sizes. You can construct the playhouse by fastening the pallets together with nails or screws, skipping the need for extensive cutting or drilling.
That said, having at least a cordless drill can make things easier and faster. But if you prefer the old-fashioned way, you’ll still be able to create a safe, budget-friendly playhouse with just a few manual tools.
How long does it take to make a DIY playhouse?
The time required depends largely on the design and materials. A simple cardboard playhouse can be completed in just a few hours, while a more detailed wooden structure may take several days or even a couple of weekends to finish.
If you’re building a basic outdoor wooden playhouse with pallets, you might be able to complete it in 1–2 days if you’re experienced with DIY projects. However, if you’re a beginner or working with kids, it’s best to spread the work across several weekends to keep the process enjoyable and stress-free.
Indoor playhouses made from fabric or converted closets are much faster. These can often be set up in an afternoon, especially if you’re using ready-made items like sheets, cushions, or pre-built frames.
Remember, the journey is just as important as the result. If you involve your kids in painting, decorating, or small assembly tasks, the project will naturally take longer—but those extra hours are what make the experience unforgettable.
What are the safest materials for kids?
When building a DIY playhouse, safety should always come first. The best materials for kids are natural, untreated wood, which is strong and free from harmful chemicals. Avoid pressure-treated wood, as it may contain substances not safe for children.
For painting and finishing, always choose non-toxic, child-safe paints. Many paints today are labeled as safe for children’s furniture and toys, which ensures they don’t release harmful fumes.
Fabric playhouses should be made from breathable, washable materials like cotton or polyester blends. Avoid fabrics that are easily flammable unless they’ve been treated with fire-resistant coatings.
If you’re building with cardboard, make sure it’s clean, sturdy, and free from staples or sharp edges. For playhouses that require adhesives, choose non-toxic glues and avoid strong industrial chemicals.
Finally, always sand down wooden surfaces to remove splinters, cover sharp edges, and check for exposed screws or nails. With these precautions, your DIY playhouse will be a safe, welcoming space where your kids can play for hours worry-free.
Conclusion
Creating a DIY playhouse is one of the most rewarding projects for budget-friendly parents. It saves money, sparks creativity, and provides kids with a magical place of their own. Whether you choose cardboard, pallets, fabric, or repurposed furniture, the possibilities are endless—and affordable.
By planning carefully, choosing safe materials, and involving your children in the process, you’ll not only build a playhouse but also create unforgettable family memories. And remember, the goal isn’t perfection—it’s fun, imagination, and love.
So, why spend hundreds on a store-bought playhouse when you can craft something unique, budget-friendly, and full of character? Grab your tools, gather some materials, and start building your child’s dream playhouse today!


